Monday, January 27, 2014

Peanut Butter Cupcakes - Nutty Personal Only


Every morning for the past month I've been eating Peanut Butter Sandwiches. Two toasted slices, spreaded with two tablespoons of peanut butter on the toasted side while it's still warm and folded in half. The bread is soft, but crispy on the inside filled with gooey, peanut buttery goodness, it's been the highlight of my day for, like I've said, the past month which is - pretty sad. But because I enjoy my preday peanut butter sandwiches so much, I decided to make a peanut butter dessert that paid a very special homage to that. 


These "Double" Peanut Butter Cupcakes are moist and dense on the inside but light, crispy and golden on top. Which aesthetically doesn't matter because we're just going to cover it with a delicious Peanut Butter Frosting. However texture wise it almost exactly replicates what I love so much about my morning Peanut Butter Sandwiches. 


Usually cupcakes are way to sweet, especially the frosting, which is why I prefer to make my own. And not to toot my own horn but, I think my frosting is the pandemic to curing world peace. All in all once you try these I think you would all agree that this cupcake is a peanut butter lovers dream dessert. So be sure to stick around so you can learn how you can make these delicious chow-fections!


The first step is to preheat your oven to 350. Using a mixer cream together butter, peanut butter, and sugar until smooth and light in color. I think it goes without saying that your butter should be room temperature. Once everything is nice and creamed, add in an egg and a drop of vanilla extract. 


In another bowl whisk together your dry ingredients to ensure their are no large lumps. Whisking achieves the same goal as sifting but instead of making a mess all over the countertop you keep it in the bowl. Begin by beating in 1/4 cup of milk to loosen the mixture. Then add half of the flour. Make sure all of the flour is incorporated before you add in another 1/4 cup of milk. Alternate with the rest of the flour and finally finish with the last 1/4 cup of milk. At this stage you can switch to a spoonula because we don't want to overmix the batter. 


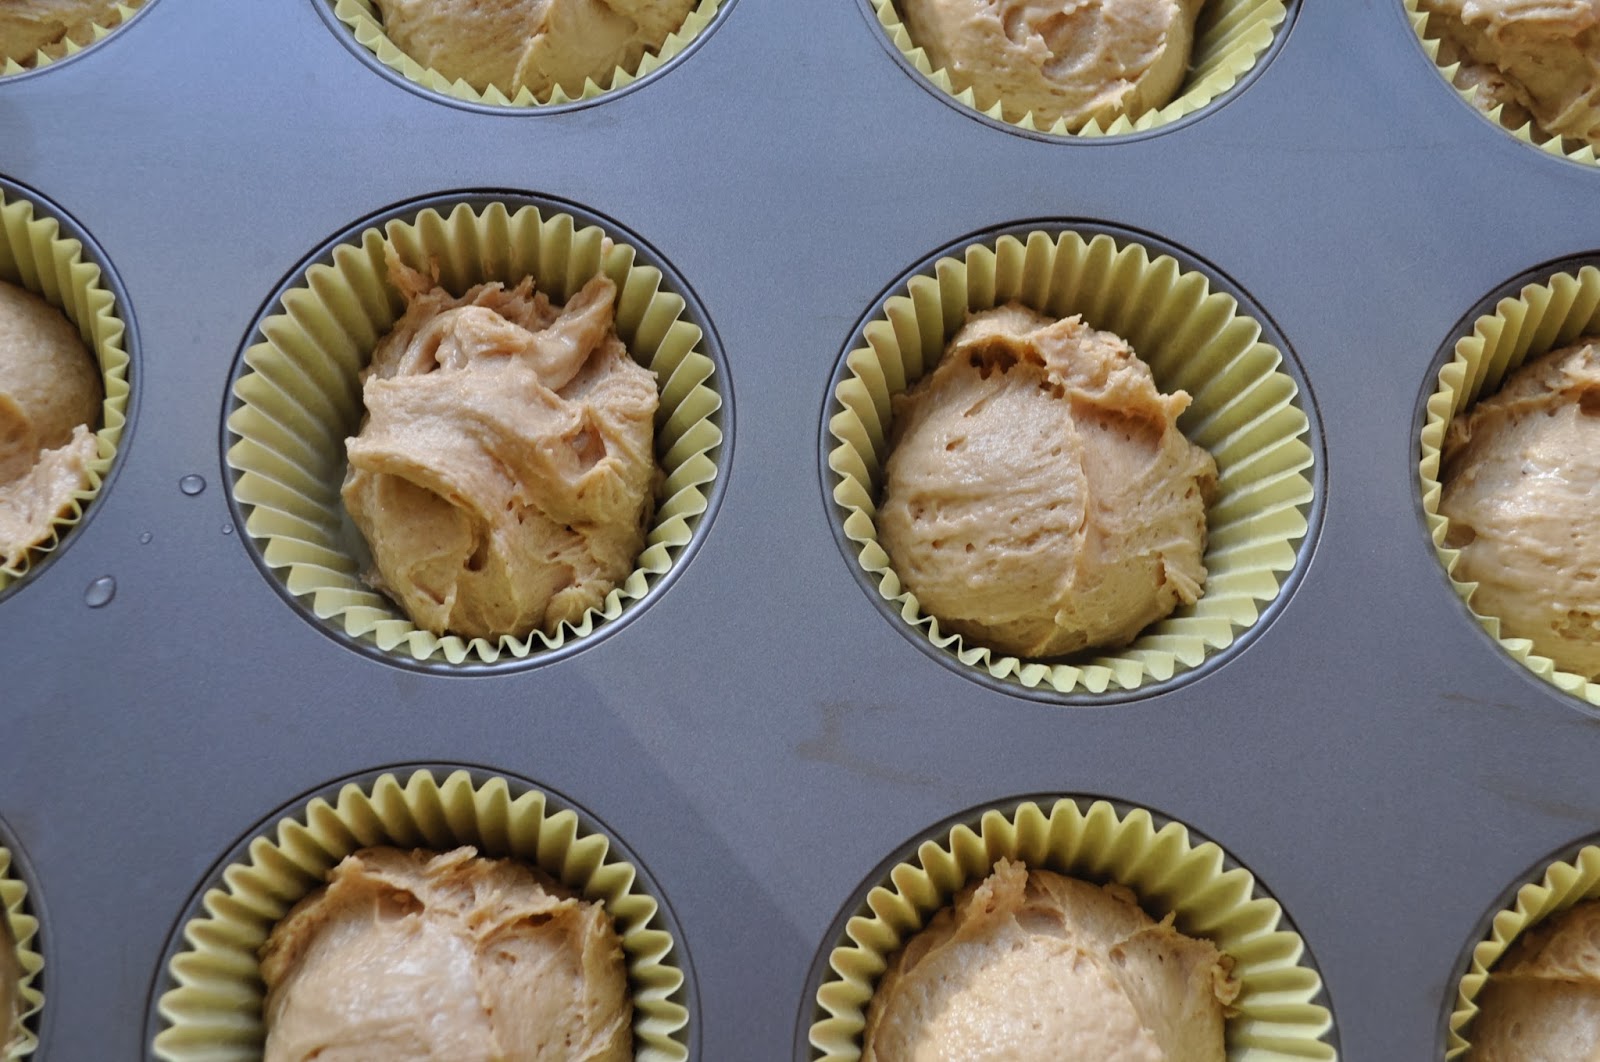
This recipe will yield exactly 18 cupcakes, which means you should fill each cupcake tin about 2/3 of the way up. For this recipe, because this is a peanut butter cupcake, I used yellow cupcake wrappers. However if you didn't have those just try to choose ones that are peanut butter looking, like a brown or orange. Bake for 18-22 minutes or until a toothpick comes out clean and the top is golden. Let these cool on a wire rack. 


While these are cooling you can make your frosting. This is super simple. Take peanut butter, confectioners sugar, honey for stability, and vanilla and whisk this together. Add tablespoons of milk until you've reached a frosting consistency. 


Ten minutes later your cakes have probably cooled enough to frost. If you have a piping bag that would be ideal, but for me I just used a plastic bag with the corner cut off. For this cake I think it's best to use the largest piping tip you have because I think thick swirls of frosting look the best. 


Double Peanut Butter Cupcakes are the perfect dessert for the nutty people in your life. I personally enjoy a tall glass of milk with this cupcake because I find the cake is very dense and you'll need that something to wash it all down. 


As you know peanut butter works all kinds of wonders with different flavor profiles like jam, and chocolate. For fun variations you can add chocolate chips into the cupcake batter, or swirl some raspberry jam into the frosting. There's an infinite amount of possibilities, okay...I'm not going to BS you, there are probably ten more variations you can do with this. But like you already knew what I was going to say, anything you try will taste delicious. Just remember to be creative and push the boundaries. That is it for this recipe, hope to see you next week. And as always, 

Chow!

Recipe

For the Cake

1/3 cup butter, softened
1/2 cup peanut butter
1 1/4 cups packed brown sugar
1 egg
1 teaspoon vanilla extract
2 cups all-purpose flour
1/2 teaspoon salt
1/2 teaspoon baking powder
1/2 teaspoon baking soda
3/4 cup milk

For the Frosting


1/3 cup peanut butter
2 cups confectioners' sugar
2 teaspoons honey
1 teaspoon vanilla extract
3 to 4 tablespoons 2% milk


You Might Like:

Tuesday, January 21, 2014

Momma's Sour Cream Cookies - Well How I Imagined Them To Be


Despite the title my Mom never made these, but that doesn't mean I can't make them for myself. 


After those Monday Night Football Parties, don't you always have leftover sour cream. Whether it's from that delicious five-layer dip, or those disgusting vegetable platters, I know I'll always have extra. And up until now I didn't know what to do with it. That smidget of sour cream would just sit in the back of my refrigerator taunting me, saying, "Your mom never loved you!" I never knew why it would say that,or how could it even talk, nevertheless I would always be sad after that comment. Finally after the hundredth party, failing to completely use all the sour cream we bought, I went berserk and was just about to throw the sour cream away when suddenly, it came to me. What the smidget was telling me was that my mom never loved me because she never made Sour Cream Cookies. And that, to make everything right, I needed to make them... and eat the whole batch. Okay, well I'm not sure about the eating the whole batch part but make them I did, and they did not disappoint. 


Imagine your Mom hugging you while you're eating the best cookie ever, this cookie is twice as good as that. The sour cream really makes the difference in this recipe. These cookies are light and soft, and ever so gently kissed by that touch of sweetness. You can be sure these cookie come with hugs and kisses built in. I know Mother's Day is 4 months away, but don't wait that long to show your mom...how much better of a cookie you can make. This classic cookbook cookie, which deserves so much more praise and recognition than it gets, is easy and delicious, so without further-a-do, let's get started!


In a clean bowl, whisk together all your dry ingredients. That is, your flour, salt, baking powder, and baking soda. Set this bowl aside. 


Using the same, singular spot in your house that is bright and photo worthy, cream together your room temperature butter and sugar. Start slow and then crank it up. You are looking for the butter to become pale and fluffy, and all the sugar granules to disappear. Add your egg, vanilla extract, and sour cream, and beat for one more minute. Next, slowly incorporate the flour mixture into the butter until all of the flour is used up, and a batter forms. At this stage you could refrigerate or freeze this depending on when you wanted to make the cookies. 


In my case I was hungry now. I didn't waste a second to toss these into the oven. Using any method of greasing, lightly oil your cookie sheet, or use a non-stick silpat. You can get about fifteen good teaspoon dollops on a 9x13 in. baking sheet. 


Wet the tip of one of your fingers and flatten each of the cookies to make sure they are all the same height and they spread thinly. Lastly sprinkle a little sugar, sanding sugar would be best but granulated works fine, on the tops of each cookie. This will give them that professional look that tells people, yes, I know what I'm doing. Even though you're feeding them cookies that you learned how to make from a random stranger you met on the internet.


One's missing...


After 10 minutes under the delicious rays of a 375 oven, your cookies are done. Let them cool on a rack before dusting with powdered sugar, or drizzling with a delicious fig glaze. 


WHAT! A Fig Glaze! It's so simple I don't even have a recipe for it. Take fig jam, powdered sugar and a tablespoon of milk and combine it in a small bowl, you will be shocked by the results. I especially think it works wonders with this Sour Cream Cookie, a barely sweet cookie is accented with the figgy-caramelliness of the fig jam, a match surely made in heaven.     


That's it for this recipe, scroll down for more chow-fections, and I will see you next week with another delicious, tested dessert by the finest here at the Chowfectionary Creations Studios. Well someone had to say it. 


Special Thanks to my cousin Wyfield for sending me that jar of Fig Jam. Wyfield if you are reading this, it was so good I peed my pants, and I only pee my pants when I get excited. And as always, 

Chow!

Recipe
1/3 cup unsalted butter
1 1/2 cups all-purpose flour
1/2 teaspoon baking powder
1/4 teaspoon baking soda
1/4 teaspoon salt
1 cup sugar
1 large egg
1/3 cup sour cream
1/4 teaspoon pure vanilla extract 


Optional ingredients: Fig Jam, powdered sugar, milk

You Might Like:

Flat and Chewy Chocolate Chipped Cookies
Nutella No-Bake Crumb Bars
Faux Chocolate Macarons

Coming Soon - Momma's Sour Cream Cookies


Leftover Sour Cream? Make Sour Cream Cookies. It's just that simple.

Tuesday, January 14, 2014

Strawberry Lime Oatmeal Squares - Snack on awesomeness


What's that? I'm sorry, I couldn't hear you over the awesomeness of this dessert. When you take that first bite your teeth barely crush that crisp crunchy crust, however then it sinks into the soft fruity center. Buttery, strawberry-y, and slightly tangy, I don't think there's much more you could ask of this chow-fection. By the way, just to let you all know, in order to even comprehend this post you need to have read my previous post on how to make Lime Curd. That's pretty much the other half of this recipe so head on down there if you do not want to be just half as smart as everyone else. Seriously stop here if you have not read it. I mean it. He said assuming all of you could see his very serious expression.


Okay, so those of you who are left have either done what I've said, or are internet trolls, whoever you are you're definitely in for a treat. I take an easy shortbread crust, heartened with nutty bursts of oats, and layer it with strawberry preserves and lime curd. Absolutely delicious, and not to mention super easy. Seriously, as easy as mixing things in a bowl. So let's get started!


In a large bowl mix together your flour, sugar, butter, oats, salt, and baking powder. Yes, those are basically all the ingredients in this recipe, which just goes to show how simple this chow-fection is. Preferably you want to use a pastry blender, that is the wire instrument on the right side of the picture above. I think it just integrates the butter and the dry ingredients that much more efficiently but if you don't have one a fork or your hands will do fine. 


Using the paper from your sticks of butter, or a can of vegetable spray, lightly grease a 9x13 inch baking pan. Our dough has a fair amount of butter in it so you shouldn't be worried much about sticking. Press 3/4 of the mixture into the pan, reserving the rest for the crumble topping. 


Now it's time for, in my opinion, the best components of this dish. The strawberrying and the lime curding of the bars. First we are going to lightly spread a layer of strawberry preserves onto the crust. If you think you won't be needing the full measurement of preserves that's absolutely fine. It's better to spread less jam than more. You want to try not to spread the jam to the absolute sides of the pan. If the jam is in contact with the baking sheet then you might have some adherence. Next we can spread on the lime curd. My recipe for lime curd will yield 1 cup of custard which will all be used in this recipe. The same rules apply, evenly spread it across the jam, careful not to touch the sides. Finally sprinkle on the last bit of crumbs and you are ready to bake. 


Allright, into the oven at 350 for about 40 minutes, or until the top is lightly brown and crispy. You'll know when it's done when your whole house smells like butter and Key Lime Pies. The reviews on these squares were absolutely astounding as my brother even asked me to make a second batch for his classmates the following day. If the pickiest teenagers in California like your dessert you know you're doing something right. 


Well, there you have it. Strawberry Lime Oatmeal Squares, a must make for this summer season. What? It's summer in Australia. But seriously, I really hope you make these for your family, scroll down to view this recipe and more. And as always, 

Chow!  

Recipe
1 3/4 sticks salted butter, cut into pieces
1 1/2 cups all-purpose flour
1 1/2 cup instant oatmeal
1 cup packed brown sugar
1 teaspoon baking powder
1/2 teaspoon salt
3/4 cup of strawberry preserves
1 cup of Lime Curd


You Might Like:

Strawberry Cream Cheese Coffee Cake
Roasted Strawberry Tart
Chewy Fudgy Brownie

Coming Soon - Strawberry Lime Oatmeal Squares

Who said you can't bake lime curd into a square. Stick around for this one.

Sunday, January 12, 2014

Lime Curd - Easy Peasy Lime...wait


What do you do when you're mom's co-worker gives you a bag of limes? You cannot make the proverbial lemonade, but you can make this delicious chow-fection! Perfect for filling pies, or even breakfast with toast, this lime curd sure does it all. Did I mention it was easy too. You don't need any fancy equipment, nor do you need to be a very good chef either. If you can follow directions you can make this crud...I mean curd. You don't know how many times I'm going to make that mistake in this blog. This curd has a pudding-like consistency with a light lime flavor. Absolutely deliciouso. So scroll on down so we can get started!


To begin I'm going to separate two yolks and two eggs into a small bowl. Please do not throw those whites away. Every time you waste your whites a whale from Wisconsin wallows. I'm not sure if that made much sense but the alliteration was very satisfying. The point is you can use those whites for macarons, or even a breakfast omelet. 


Just for your information these are limes, despite their very lemony persona. Not every citrus can have it's own proverb. Juice a couple of limes until you have about 1/2 cup of liquid. Don't even think about using the stuff from the plastic lime in the back of your fridge. That stuff is unnatural and should be burned. Add an equal amount of sugar, or more, depending on the tartness of your limes. My limes were pretty tart, so I ended up using about 3/4 cup of sugar but you can find all that out in the recipe below. Cut up some butter, and add a pinch of salt. 


Yes those are chunks of butter, and not tofu. On a double broiler, which is just a heat-proof bowl over a pan of simmering water, whisk all the ingredients constantly until the butter has melted and the mixture begins to thicken up. In the beginning it's going to feel like you're wasting your time. You will be tempted to walk away, DO NOT! 


Stay there and keep whisking. You'll look like an idiot, but you'll be a smart one and those are the only types of idiots that are acceptable. After the butter has melted it should only be a couple more minutes until its done. Almost magically it will suddenly firm up, and you will be looking at one of the most beautiful curds in the country.


 Take the custard off the heat and taste for flavor. If it's too sweet add some lime zest or juice. If it's too sour add some sugar or butter. Once you are completely satisfied with the taste and texture of your curd, immediately pass it through a metal sieve too ensure you have a smooth, chunkless custard. Odds are there will be some pieces of egg that have scrambled and we don't want that in our final product. But once you do that, you're done! Well almost. 


Using proper plastic wrap wrapping technique, which is pressing the plastic to the custard so it does not form a skin, refrigerate the mixture for at least an hour so the flavors meld and it cools off.  And addition to the flavor being intensified the curd will thicken up and you'll have one of the most delicious citrus desserts on this side of the desert. You can use this for pies, layering cakes, heck, if no one's watching take a shower in it. I don't judge. But seriously I hope you give this a try. Stay tuned for next week when I show you what I did with this lime curd. Hint: something that rhymes with Trawberry Fime Boatmeal Tares, so stick around for that one. And as always, 

Chow!


Recipe

Makes 1 cup of Lime Curd

1/2 cup freshly squeezed lime juice
1/2 cup sugar (or 3/4 cup, if using really tart limes)
2 large egg yolks
2 large eggs
pinch of salt
6 tablespoons unsalted butter, cubed


You Might Like:

Strawberry Lime Oatmeal Squares
Mini Blueberry Tarts
Chewy Coconut Bars

Coming Soon - Lime Curd

Just don't mistake it for Lime Crud.

Saturday, January 4, 2014

The Best Zucchini Bread - That's in the world

After staying up all night to watch the ball drop, or in some places a large shoe, a giant peach, or a live possum, you want something super delicious to wake up to. And this, is that somethin' something. Not only is this really tasty, but you can prepare this days before you want to serve. Actually I'll say my peace now, it does taste better if you wait for like two days. The bread sinks down into the tin, and the flavors meld together, I think it's just superb. But please don't wait more than two days because then you will have a different kind of green thing running through your bread, and it won't be the zucchini.

 I was granted the privilege to make this zucchini bread with my legendary Auntie Rosa on my trip to Connecticut this Christmas. We actually made ten loaves which if you do the math equates to about, a lot of work. But it was so worth it. We used her hundred year old recipe which was handed down to her by her mother, and her mother before her. How could this recipe be bad! Anyways like many quickbreads this only takes a few moments to prep so first things first preheat your oven to 325. That's just good time management. 


Using a grater, or a 3000 year old food processor (no offense Auntie Rosa) we are going to shred the zucchini into, well, shreds. Quarter your zucchini into chunks small enough to handle. No need to peel off the skin because zucchini rinds are very thin, plus when we bake them it'll all soften anyways. Once all of your zucchini is prepped we can begin the wet assembly. 


This includes your eggs, sugar, and vegetable oil. Usually I would blanchir my eggs first and then drizzle in the oil, but Auntie Rosa's recipe said otherwise. Who was I to argue with a 100 year old recipe. And for those of you who stumbled on the funny french word in the sentence before, to blanchir means to make white or light in color. In baking, this term refers to creaming eggs or egg yolks and sugar together until pale and fluffy. Instead we combined all three ingredients together until homogenous and smooth, I think it worked out the same. And once everything is combined stir in the milk and the zucchini. 


In a separate bowl we're going to sift together our dry ingredients. A.K.A your baking soda, not baking powder, salt, flour, and cinnamon. If you consider "love" a dry ingredient you can add this in as well. Dump your dry mixture into the wet base and stir until just combined. Try to dig from the bottom of the bowl so as to fully incorporate the flour stuck to the bottom. You don't want to overmix the batter so as soon as everything is combined stop and walk away. I've had to handcuff my hands behind my back to resist the urges to stir but hopeful you all are better behaved as I am.


Butter and flour your loaf pans. I believe the ones we used can be described as the mini or medium disposable loaf pans but I'm not completely sure. I think it's best if you just look at the picture and figure it out for yourself. By the way if one of you do figure it out please leave a comment below so I can add it in to the post. That would be very much appreciated. Divide the batter equally, I'm not sure why you wouldn't, into your pans about 3/4 of the way up. These will rise and you don't want muffin tops on your bread. Sprinkle with some roughly chopped nuts, Auntie Rosa uses walnuts, and wait until the oven is preheated. 


Bake for about an hour, or until when you insert a toothpick into the center...ah you know the spiel. 


Transfer them onto a wire rack and let them cool completely before serving. Like I said before I think these taste even better after a couple nights on the countertop. Auntie Rosa likes her bread sliced, toasted and spread with cream cheese, and I have to agree. The fluffy, moist, slightly sweet and nutty zucchini bread goes hand in hand with the cool tangy cream cheese. I especially love the crust on the top that gets nice and caramelized and sweet, simply heaven. Thank you Auntie Chow for this wonderful chow-fection and letting me bake with you, it was truly, an honor. I really hope you all make this recipe, scroll down for the recipe. And as always, 

Chow!  

Recipe 
The preferred method of consumption. Toasted with Cream Cheese.
3 eggs
1 cup of vegetable oil
2 cups of raw zucchini (grated with skin on)
2 cups of sugar
3 cups of flour
1/2 cup of milk
1 teaspoon of baking soda
1 teaspoon of salt
3 teaspoons of cinnamon
1 cup of chopped nuts (enough to sprinkle)

*For 2 loaves

You Might Like:

Peanut Butter Cupcakes
Non Dairy Strawberry Banana Ice Cream
How To Prepare A Coconut

Friday, January 3, 2014

Coming Soon - The Best Zucchini Bread


What's so special about this zucchini bread? Years and years ago, long before whisks and spoonulas my aunt's grandmothers and their mothers before them made zucchini bread for the entire village. Well I'm not sure about that village part but I do know this recipe is at least twice as old as I am maybe even a little older. I stole this bread from my Auntie Rosa's cookbook last week when we made this together, and I have to say, it was delicious. We quadrupled the recipe and made ten loaves to give to all of our family members. I've never made zucchini bread before and I have to say not only were they easy to make but they're healthy and beautiful. I think it was because I had really good teacher. This is the perfect gift for your favorite grandparents or friends that you want to live for a very long time. The bread is lightly sweet and very moist, you have to stick around for this one. I'll probably have the recipe out in a few short days so... And as always,

Chow!

Type in a Recipe or an Ingredient