Tuesday, February 25, 2014

Flat and Chewy Chocolate Chipped Cookies


Stop! Slowly read these next sentences with all your might and attention. This...is...the...best...chocolate...chip...cookie...recipe...in...the...world. Got it? Good. Okay, I think we all know that nothing is better than a freshly baked chocolate chip cookie. Chewy, chocolatey, and warm. Am I right or am I right. But no one likes those doughy dry mounds of crap people call cookies these days. That's why this week I'm bringing back the good ol' days with America's favorite cookie, The Chocolate Chip. 


Howard Taft. I approve of these cookies. In fact my pockets are full of them.

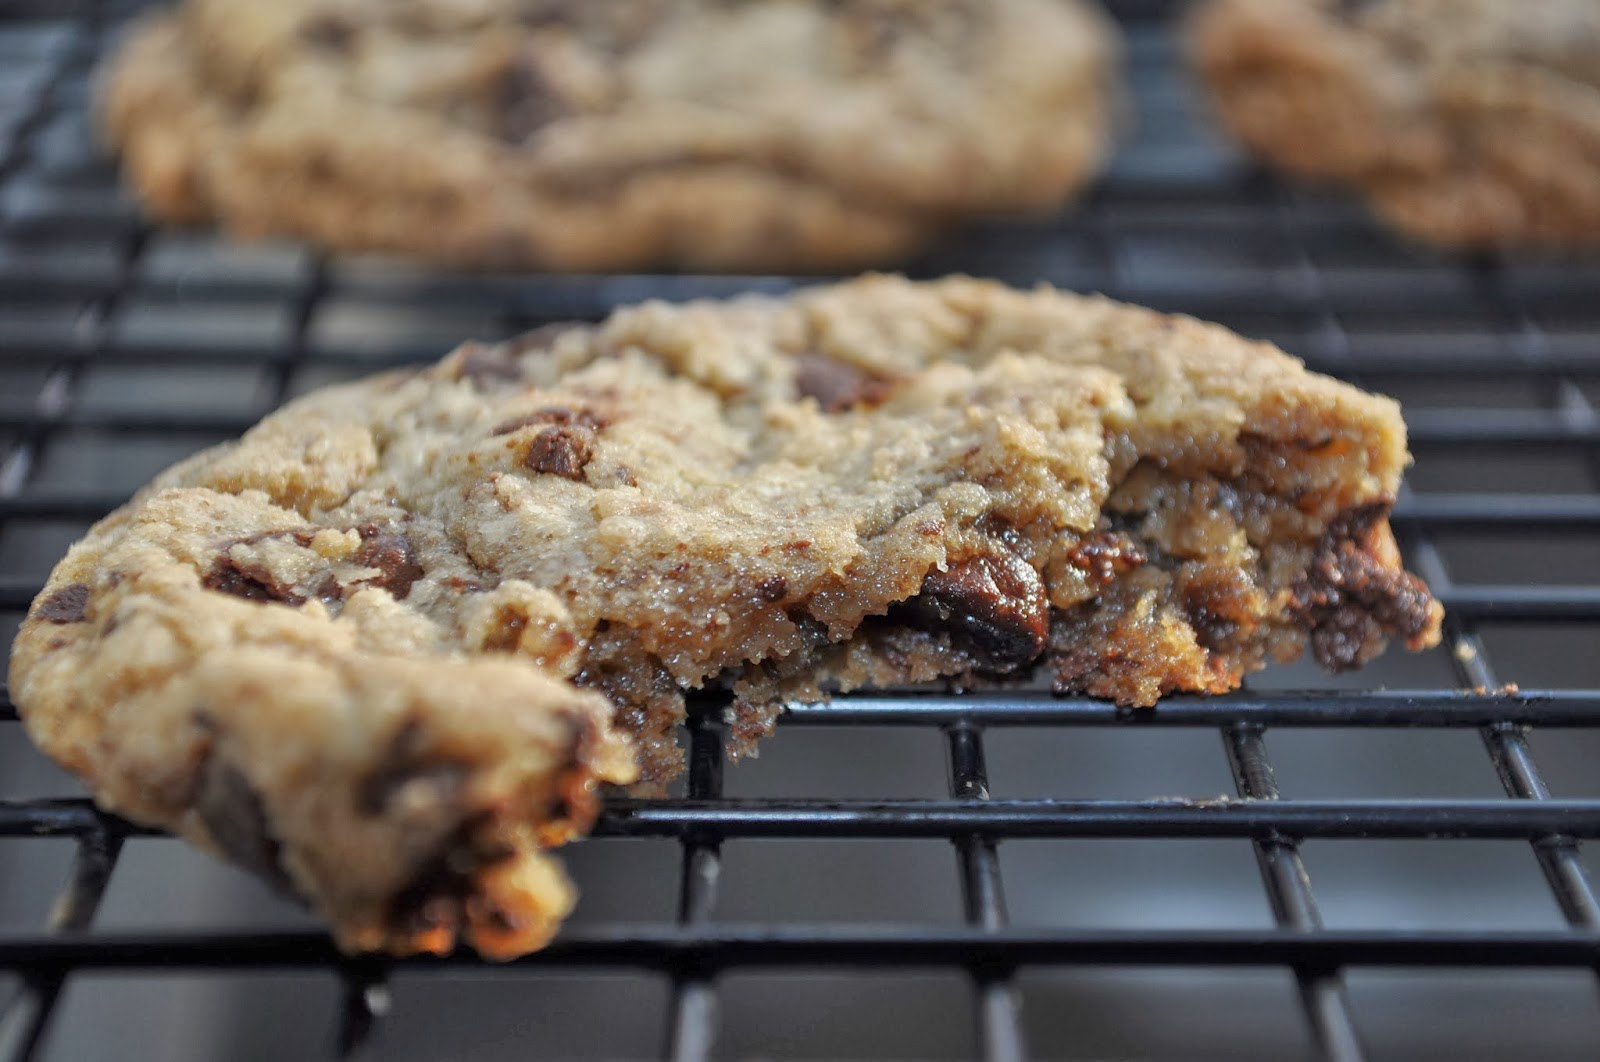
The best types of chocolate chip cookies are the flat and chewy ones. I even prefer them to be slightly bendable. That's the hallmark for a really good choco-chip. Not too sweet, and dotted with chips of chocolate. This recipe is all that and more. If you follow this recipe to the period, I can guarantee that you will be presented with a batch of the most perfect, classic chocolate chip cookies you have ever tasted and or seen. The ones Ben Franklin, and Howard Taft would be proud of. And you can be sure President Taft had a few cookies in his day.


But before I begin this recipe I want to set straight a stereotype that has been bugging me for quite a while. The truth, whether or not all grandmothers know how to make chocolate chip cookies. The answer is they do. In fact once a mother becomes a grandmother they are promptly possessed with the ability to create the perfect chocolate chip cookie. So in the spirit of pursuing the best chocolate chip cookie product I could possibly deliver to you, I kidnapped my grandma from Atlanta to help me with this week's chow-fection. (She's here. She is just a little camera shy.) Oh yes, Asian Grandmas make the best Chocolate Chip Cookies. Thank you Ah-ma for being here and helping me with the blog <3. 


First we'll prepare the dry ingredients. Measure out flour, baking soda, and salt and combine it in a bowl. Take 2 sticks of butter, that's 1 cup, and melt it slowly over low heat. I'm not sure if there's a scientific reason why you should melt it slowly but grandma said it so grandma got it. I do know that melting your butter, as opposed to leaving it cold or room temp, makes for a chewier cookie. And adding all the butter that we are, the cookie will melt down in the oven and become nice and flat. 


In another bowl add your brown and white sugars. Cream together your butter and sugar until barely incorporated. The key throughout this cookie making process is not to overwork the dough. Mix just enough to get by. The same concept goes for homework and chores. 


Traces of flour are okay because we still have to mix in the chocolate


Next add in an egg, your vanilla extract and milk. Slowly combine your dry ingredients on low speed. When you see that the only flour left is on the sides of the bowl stop mixing and switch to a spatula. Go through the dough to make sure all the flour has been mixed through. 


Now that we've finished the cookie part of this Chocolate Chip Cookie, we need to prepare the chocolate chips. After all this recipe is called Chocolate Chipped Cookies. Like Chipped as in chipping wood, and chip as in chocolate chip. Am I right. Okay enough with the bad puns...well seeing that I already put it in the name we can't really make it go away. Anyways take 2 cups of chips and chop them up on a cutting board. You're not looking for a super fine shaving, just small chunks of chocolate. I think this better distributes the chocolate throughout the cookie and gives it that chocolatey swirled finish. Once your happy with the size of your chips, mix it into the rest of the batter. Remember not to overmix.  


The last step is to leave it on the countertop to rest for an hour. This is another one of those steps that I just don't understand. Maybe the gluten in the flour has to rest. I don't know. All I know is that I don't know how these cookies would have turned out if I hadn't done this step so perhaps it was necessary. I guess it's just one of those unexplainable grandma magic steps that you have to comply with. 


While you're waiting wash the dishes, do your homework, take out the trash, oh my goodness I sound like my mom. Anyways, the point is your dough doesn't need to be babysat for the next hour so do something productive. Or you could prep your cookie sheet. Line your pan with aluminum foil and grease it up whichever method you choose. Either with the grease paper from your butter or with veggie oil spray. You don't need much to keep these from sticking because we have so much butter in the cookies themselves. 


With a normal ice cream scoop (About 1 1/2 tablespoons), you can yield 6-8 cookies per 9 by 13 inch pan. Do not try to be a hero and fit a dozen on a pan because these will spread out, quite a bit. You could, once you portion out your balls, roll them into perfect spheres so your cookies come out perfectly round but I'm far too busy to squander it on the inconsequential. Plus I can appreciate a rustic looking product, it's homemade after all. 


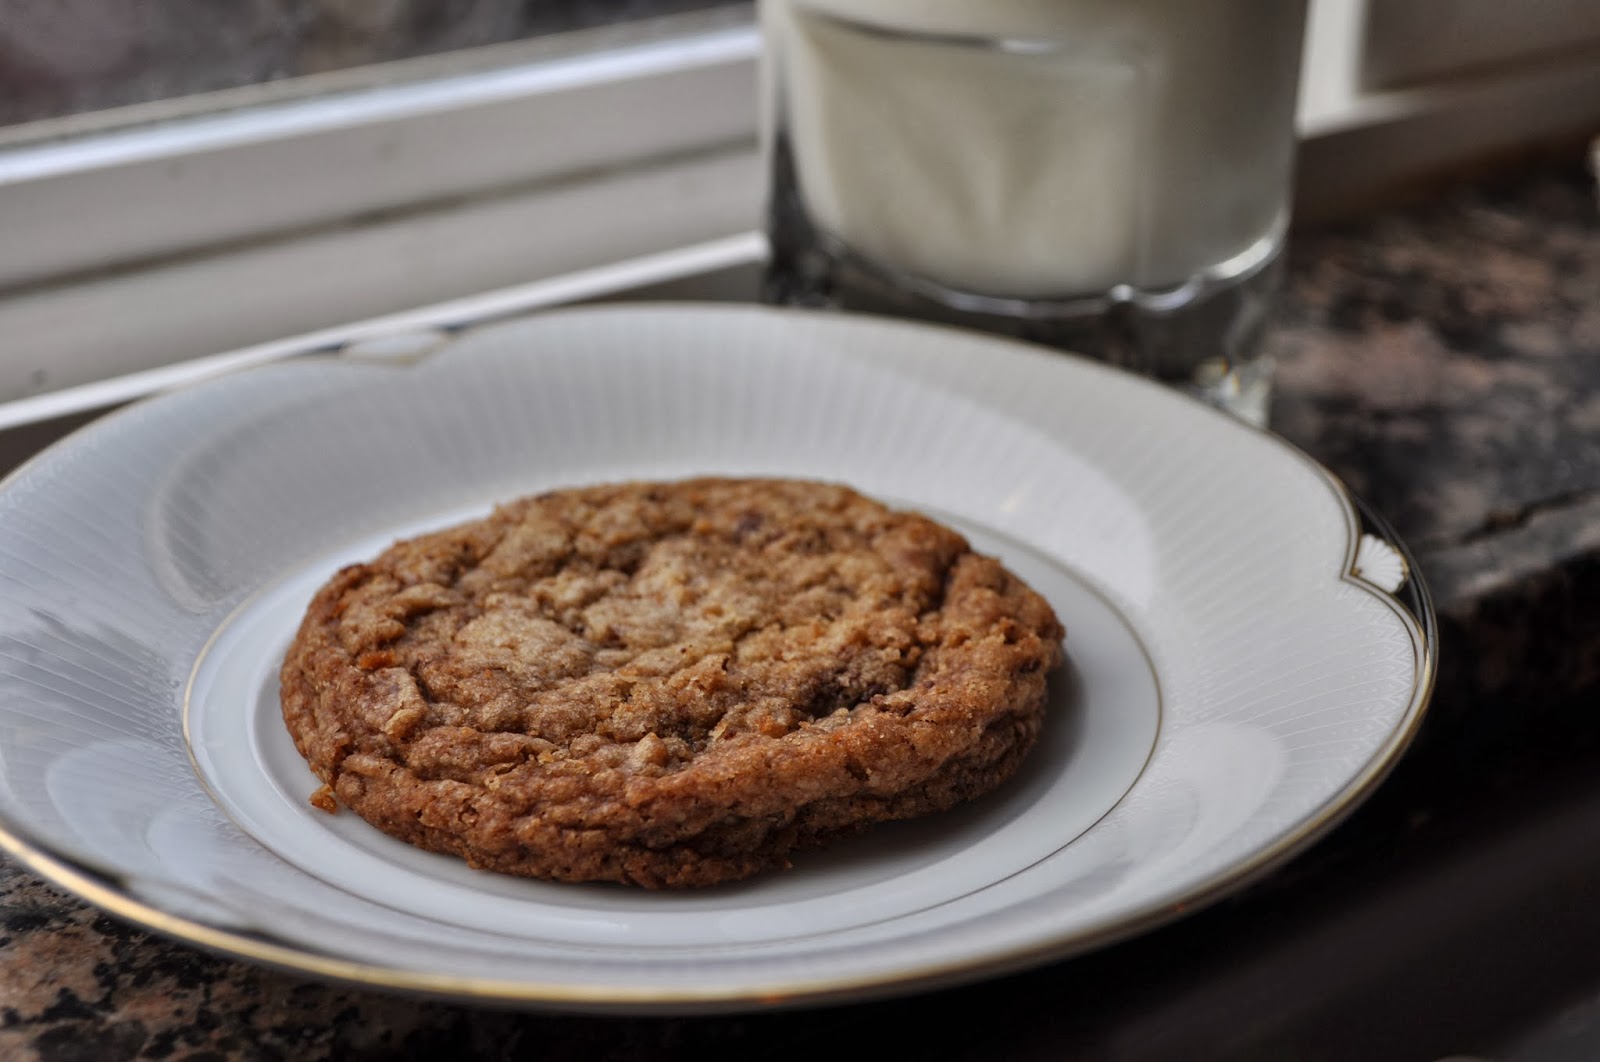
Wow, I would be jealous if I were you. Forced to read the end of this blog without a cookie. Good thing I'm not you. I'm actually eating a cookie right now as I type. Shoot all the keys are covered in chocolate. That's what I get for flaunting my cookie prosperity. But in complete seriousness these cookies are the BEST Chocolate Chip Cookies I have ever had. They perfectly embody those fresh warm grandmother cookies we all have grown to love and reminisce about in the middle of the night. The only difference is now you don't have to mark the one week out of the year that your grandmother comes to visit because now you can make these whenever you feel like it. So I really hope you all get your aprons on and make these cookies because your tummy will surely thank you. Thank you Ah-ma for the recipe and helping me today. I love you. And I love you all (Now I'm talking to you, my readers). See you next week with another chow-fection. And as always, 

Chow!


Recipe
2¼ cups flour
1 tsp baking soda
1¼ tsp kosher salt
2 sticks (1 cup) unsalted butter, melted
¼ cup granulated sugar
1½ cup dark brown sugar, packed
1 egg
2 tbsp milk
1/2 tablespoon vanilla extract
2 cups chocolate chips, chipped


You Might Like:

Crunchy Chewy Orange Chocolate Cookies
Momma's Sour Cream Cookies
Fudgy Chewy Brownies

Coming Soon - Flat and Chewy Chocolate Chipped Cookies

Get ready cause we're kickin' it grandma style. That is to say this week we're going to pay homage to the things we love our grandmas for, money on our birthdays and Chocolate Chip Cookies. Stay tuned for this one. 

Monday, February 17, 2014

Mini Blueberry Tarts


Well President's Day is here again. How many of you know why we have that holiday? And you call yourself an American.* Well it doesn't really matter why we celebrate it as to what we'll be doing with it, and you know what I'll be doing, eating Blueberry Tarts. It's true, these tarts are a labor of love. First you have to make a crust, then pastry cream, and then macerate blueberries, it's a lot of work. But it's so worth it. The combination of buttery crust, smooth thick cream and sweet berries, I don't think there is a better pie/tart filling combination. Well tied with bananas and cream and cookies and cream but they're all close firsts. Anyways, besides being super tasty, these aren't half bad to look at either. So I hope you guys check this one out, scroll down so you can learn how to be the envy at this year's President's Day party. Just a reminder, all of the ingredients for this and all my other chow-fections can be found at the bottom of the posts. :)


Pate Sucree


Pate Sucree is just a fancy way to say we're making a sweet pastry dough. Pate meaning paste, and sucree meaning sweet. The more you know. 


Anyways, to begin we're going to pulse together flour, sugar, and salt in a large food processor. This way we don't have to waste another step sifting. You know how much I hate sifting. Using COLD, ice cold, frozen butter, pulse on and off until most of the flour has disappeared and course pea sized pieces begin to form. Add in an egg and pulse in long strides.


 You don't want the butter to start to melt. Dump the crumbs onto a square of plastic wrap and pack it into a disc. If some of the flour is still visible just lightly knead the dough out. Chill the disc for a minimum of two hours but I left mine in the fridge over night. 


Now it's time to prep the baking pan. I know a lot of you do not have this particular tart mold, in fact I don't even think this is a tart mold, maybe it's meant for mini banana breads, whatever. I'm using it for tarts, but if you have a pan that you want to use feel free, the recipe is the same from here on. Take aluminum foil and fold it so that it comfortably fits the bottom of the pan. You're basically making a sleeve that allows you to easily lift the tart shell out of the pan after it's baked. I call this technique the Pastry Quicker Picker Upper™. So clever. Spray with non-stick and set aside.


 I'm gonna take my dough disc and divide it into eighths (cause I have eight molds). While you're rolling out one of the crusts try to leave the rest in the freezer or the fridge cause you don't want anything to melt too much. Flour a clean work surface (I thought I had to say clean. You know some people just aren't that keen.) and roll it out to 1/4 of an inch thick, that's about the width of a pencil, a little thinner than that. Don't worry if something rips while you're fitting the dough into the mold, you can just patch it up with scraps. When everything is firmly pressed against all the sides and corners, take a knife and cut away the excess hanging over the sides. If you have a large enough freezer I suggest putting the entire mold into it just to keep them cold while you continue with the rest of the batch. It's cumbersome I know, but that's the price for deliciousness. 


Keep Going You're So Close

When all is said and done it's not, because you still need to freeze the tarts for at least 30 minutes, an hour would be even better, before you can bake them. 


In the meantime take aluminum foil (again I'm not sure what other foils you can find in the stores) and lubricate it well with butter. When the tarts are ready to go into the oven, tightly fit the foil, buttered side down against the crust. This will prevent any major browning and allow the crust to fully cook without getting too dark. 


Bake at 375 on the middle rack of your oven for 20 minutos. After 20 minutes remove the foil and slide it back in for another ten. At this point you want to just watch it. Do not worry if the sides get too dark. What you really want to see is the bottom to be golden because a pale crust is a flavorless one. Let them cool for a minute and using your Pastry Quicker Picker Upper™ sleeves, transfer to a wire rack. 

Pastry Cream

Now let's talk fillings. Pastry Cream is one of those classic French things that any pastry or dessert chef should know. And rightfully so cause it's "snap your fingers" easy to make. 


Take milk and vanilla and heat it on medium over a saucepan. Vanilla bean would be ideal but since those are expensive and the donations have been pretty slow this month I'm just going to use vanilla extract. Heat it just until it reaches a roiling boil and take it off. In a separate bowl whisk together egg yolks and sugar. Next sift in equal measurements of cornstarch and flour. Whisk till smooth and wait till your milk boils. Next comes the tempering of the eggs. This just means you want to slowly incorporate the hot stuff into the eggs while whisking. Drizzle in a little milk and whisk. A little more and whisk. A little more and whisk. Until the eggs are about the same temperature as the milk, then you can just dump the whole thing in. If it wasn't clear enough, you have to whisk all the time. You don't want the eggs to scramble. 


Return the mixture to the saucepan and cook, while whisking, until the mixture begins to boil. At the second it begins to boil an amazing thing will happen. The cornstarch and flour will do it's magic and the cream will thicken up oh so beautifully. When this happens you want to continue to cook it for another 30 seconds. Whisk, whisk, whisk! You don't want the bottom to burn. Another danger you can have is over cooking it. If the cream gets too thick, when it cools it'll be so thick you won't be able to spread it into your tarts. A Chef Chow tip to you. When something cools it gets stiffer. You should always remember this if your final product should be eaten room temp or cold. 


 Using proper plastic wrapping technique, which is pressing the plastic to the surface of the cream so it doesn't form a skin, refrigerate until cold. Now I'm one of those guys who admittedly likes the crust on a tart more than the stuff inside, but this pastry cream is definitely doing something right. It's not overly sweet, nor is it too rich and you get that slight hint of vanilla, it's just perfect. Or what Goldilocks would say, Just Right. 

 On to the last part of the pastry which are the berries. Really you could use any type of berry you wanted. I chose blueberries because personally they are my favorite, well besides its slightly more expensive cousin the raspberry. The point is you could use any berry you wanted, the recipe is the same. So all we're going to do is macerate our berries with a teeny tiny drop of lemon juice, and a tablespoon of sugar. To macerate, for all those SAT prep students out there, means to soften or become softened in a liquid. Which, translated into foodie terms means it makes the berries sweeter and shinier. So we're just going to let that do it's thing while we fill our shells. 


 I don't know if any of you have noticed but, my piping skills aren't the best, which is what is traditionally done when filling tarts. So instead of making another kitchen related disaster, I let my little handy ice cream scoop do the work for me. Three scoops, give or take, and using a knife spreading it to all corners of the crust. Next scatter the blueberries, and top with powdered sugar. 


So basically half of your day is over now. But at least now you have Blueberry Tarts which will, and should be the envy of the community. Unless someone brings a Buche de Noel, then you're screwed. But seriously these tarts are really one of the best pastries we've made on this blog to date and hope you all give it a shot. I know Valentine's Day just passed but no one's gonna hate on you if you made these anyways. I mean if you gave me this I would be down for anything. So please look pass all the hard tedious work and just picture the reward. Thank you all for getting the end, I hope you have a wonderful *George Washington's Birthday Day (President's Day). And as always, 

Chow!


Recipe

For Pate Sucree

1 1/2 cups all-purpose flour
1/2 cup confectioner’s sugar
1/4 teaspoon salt
1 stick plus 1 tablespoon (9 tablespoons) very cold (or frozen) unsalted butter, cut into small pieces
1 large egg


For Pastry Cream
1 1/4 cups milk
1 teaspoon vanilla extract
3 large egg yolks
1/4 cup granulated white sugar
2 tablespoons all-purpose flour
2 tablespoons cornstarch


For Macerated Blueberries
1 pint of blueberries
1 tablespoon sugar

Thursday, February 6, 2014

Faux Chocolate Macarons - Easy and French...It can't be


Whence back in the olden times of autumn and such, I wrote a column on how to make your own Macaroons. Like I explained there's a difference between a Macaroon and Macaron, one is the coconut meringue drop and the other is the French cookie respectively. I also said that one of these days I would show you how to make a French macaron...but today isn't that day. Today I'll be showing you how to make my PATENTED macaron making method that doesn't require any skill or talent whatsoever, traits I know very few of my followers possess. Also on a totally unrelated note, every second you spend on this page is costing you a million dollars in patent and usage fees so, read quick. If you search through youtube on "how to make a macaron", everyone says how difficult and time consuming these little cookies are. I know from experience that after watching thousands (a little exaggeration) of those macaron how to videos that you get discouraged and end up reverting to the easier, more mundane desserts in the book. But, be not discouraged anymore because Chef Chow is here to save the day. My macaron method is simple, easy, and at the end of the day, taste equally if not better than the macarons you see all the professionals make. My secret? Well you're going to have to scroll down to find out.


When you go to your local fancy French patisserie and make the decision to indulge on one of those one-bite French wonders, the only thing you're wondering after you eat it is why you spent 3 dollars on that <than stale cookie. The truth is if you want something done right you have to do it yourself. And now you can add macarons to that list. This Valentine's Day make this cookie for that someone someone you like and I'll guarantee you'll get married have kids and be a billionaire. But enough with all this by-filler, I'm getting hungry so read faster so we can get started!


Any good macaron, if you didn't know, starts with a meringue base. So that's where will begin. Start by preheating the oven to 200 degrees and setting your rack to the lower third slot of your oven. Yesterday someone showed me this video on how to quickly separate an egg so I decided to test this and it and you know what, it worked. I know, that trick mind boggled me too. I also know it's sad that these are the things that boggle my mind. 


Separate three egg whites from their yolks and set it in a large bowl. Put that aside while we prepare our sugar. 


Left is Superfine, Right is Regular


Now this is the only fancy step, and you could surely do without it, I just think if you're going to put the name macaron on it, it has to show a little elegance. Take 3/4 cup of sugar and blend it in either a blender, or a spice grinder. What we're doing is creating superfine sugar which will give these cookies a glossier shine and a better texture. Now that you have that readied up you can put a whisk to your eggs. 


It's a heart, well trying to be
Using an electric mixer begin beating the whites. Wait for it to froth and toss in your cream of tartar. I thought it was funny that my dad thought cream of tartar was for making tartar sauce, which would probably explain why his tartar sauce always turned out a little differently than everyone elses. Just for the record it is a stabilizer. And just for that record the stabilizer is what helps the eggs to keep their shape. Keep mixing on medium until you reach soft peaks. At this point you should see a lot of large air bubbles and you'll think it doesn't look very right. That's because we haven't add the sugar yet. Once you add the sugar the meringue will almost instantly begin to form and it'll get glossy and thick. 


Add the sugar in small increments. When all of your sugar has gone in continue to whisk until stiff peaks. If you haven't caught on yet, stiff peaks look this and keep their shape when you flip your whisk over. 


Whisk in your cocoa powder and vanilla. Resist the urge to pour in a lot of vanilla. Vanilla extract is strong stuff and if you pour in too much your cookies will taste like candles. You know you're done when you can't see any more cocoa and the meringue looks delicious. What! That's it? I want my money back. Where's all of the fancy ingredients and the difficult steps. Were you not listening, this is a faux macaron. 


Pipe 2 inch rounds on parchment or a silpat. You want to avoid greasing the pan because I've read instances where it weighs down the macaron, or stuff like that I don't know, just don't take the risk. Bake for 1-2 hours, you're the judge. If you want a chewier macaron try one at the 1 hour mark. If you want a crunchier macaron bake it for the full 2 hours. I'd suggest taking them out around 1 hour if you want a more authentic macaron texture. However, after you are satisfied with the texture of your cookies leave the door ajar and let them cool for two hours longer. Then you're ready to fill. 


The filling is simple, nutella. How easy is that. I'm filling mine with two different types of nutella, one of them the original, but the other a fancier type of nutella with more hazelnuts than chocolate. One of my favorite aunts in the world gave me this spread while I was at their house back on the east coast so again, thanks alot. You want to spread a good amount of nutella, not so much that it is overflowing, but enough that people know it's there. And there you have it. Bon Appetit. 


When you bite into one of these you first crack into that crisp shell but then your teeth sink into that chewy center, and that nutella, it's almost too perfect to describe...actually it is too perfect, I'm just gonna stop right here. 


So I hope you learned something valuable from this page of nonsense that is my writing. As always I'm so grateful for all of you that made it this far. Comment below what you thought about this recipe, improvements, support, or future chow-fections. And as always, 

Chow!

Recipe
3 egg whites, at room temperature
1/4 teaspoon cream of tartar
3/4 cup granulated, superfine sugar
1/4 teaspoon vanilla
4 tablespoons unsweetened cocoa


Nutella for filling.

Coming Soon - Faux Chocolate Macarons


Type in a Recipe or an Ingredient