Saturday, November 30, 2013

Chocolate Bailey's Irish Cream Cheesecake - A Little Booze Never Hurt Anyone

My Photoshoping skills couldn't make up for the fact that I waited way too late to take this picture.

Happy Day After Black Friday I hope ya'll had a wonderful holiday but, it's time to get back to work. Toiling away in the kitchen, testing recipes and writing blogs. I know, such a tough life. I can't complain though if I get to eat cakes like this after; so let's dispense with the cordial banter and get started. 

I'm not saying I'm an alcoholic but, every chance that presents itself I have to take advantage of it. Sometimes I even play a game where I see how much booze I can slip into a dessert without someone noticing. I'm not sure if I won or lost, I can't really remember anything after that. But that's not the point seeing that this blog is about cooking and not about my personal life. 

After foraging through all of my cookbooks I couldn't find a decent cheesecake recipe that ticked all my boxes. Naturally I decided to create my own, knowingly winning over my mom by adding her favorite Bailey's Irish Cream. But then I felt guilty so I made a chocolate mousse to satisfy my dad. This gave birth to a new Post-Black Friday Chow inspired chow-fection. 


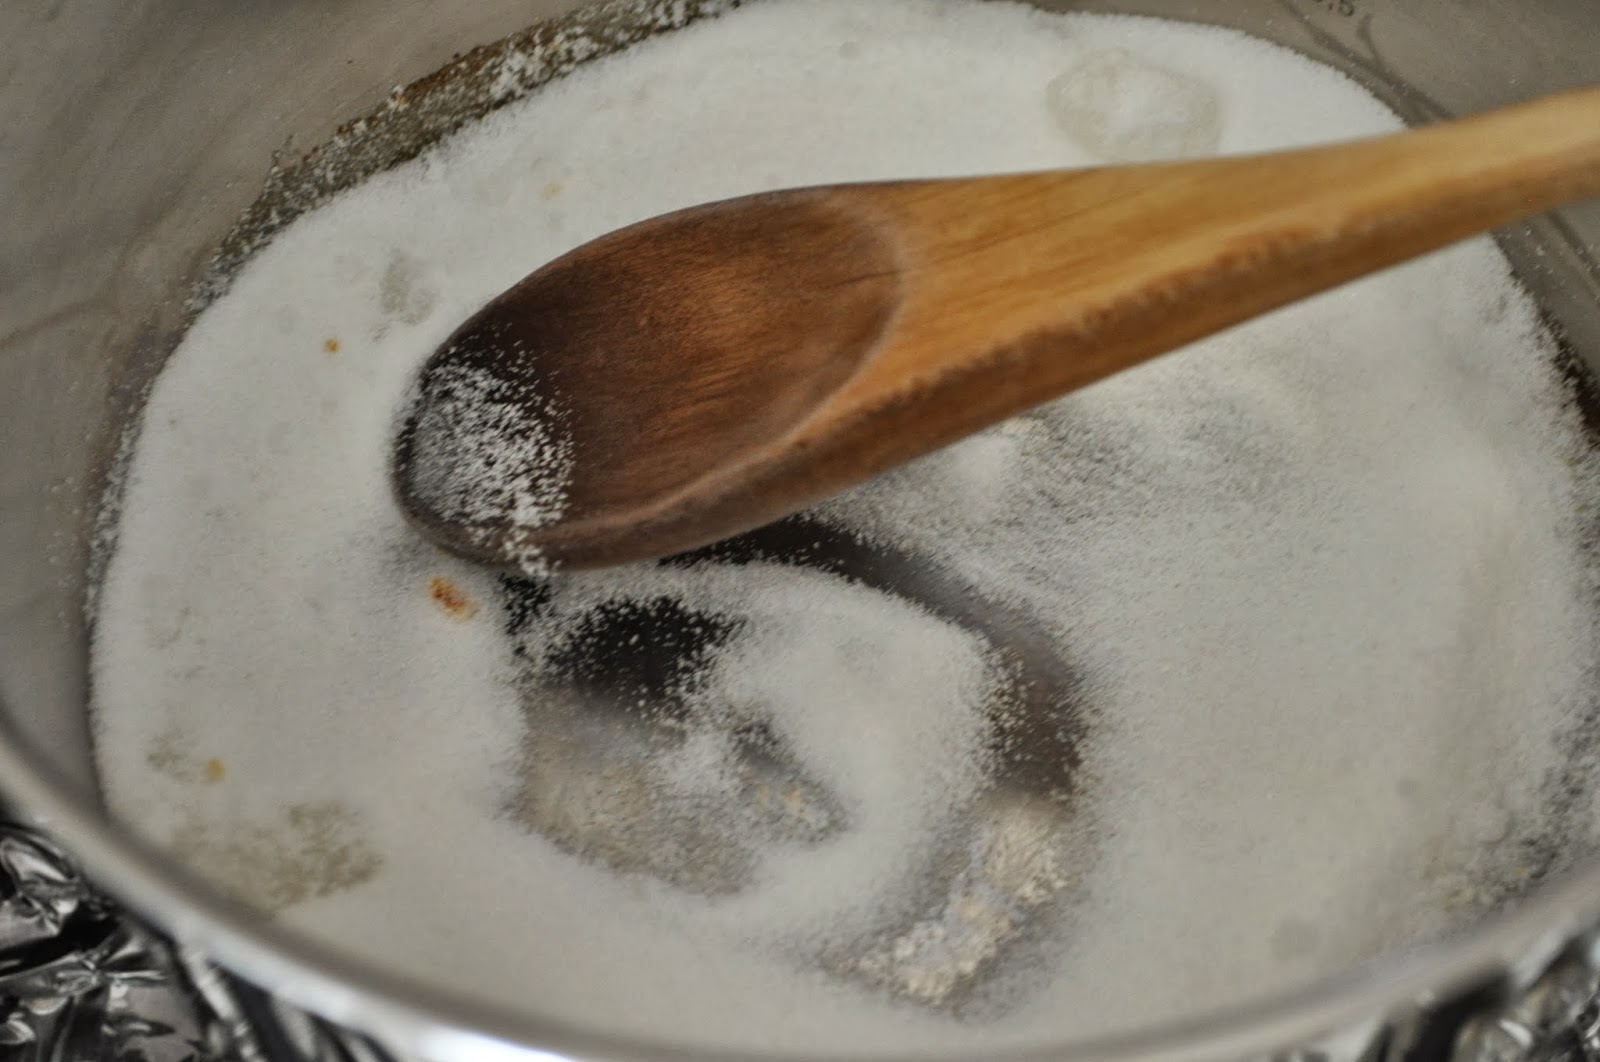
Take 3 tablespoons of butter and the cream cheese out to soften. You don't need to do what I did and leave the whole thing out. We'll use them later. So to start we're going to blind bake our chocolate graham cracker crust. When a recipe calls to blind bake something it means to bake without the filling. In your mini food processor pulse together the crackers, the sugar, your melted butter, salt, and cocoa powder. All you want is the mixture to resemble wet crumbs and when you press them together they slightly hold their shape. 


Grease a 9x9 inch pan, I used a spring-form but you are welcome to use any form of pan you want. A very helpful tip I learned is not to throw away the wrapper from your butter. There's always some grease stuck to the paper and you can use that to oil your pan. Dump the crumbs and using your knuckles or the back of spoon, pack the crumbs into one even layer. Bake in the middle of the oven at 400, uncovered, for 6-9 minutes, or until the edges are golden. Although mine tasted good I would have liked a more a chocolatey flavor. So keep in mind that the picture does not represent what yours might look like. In the recipe below I adjusted the measurements. Let it cool. I threw mine in the freezer.. 


Now, while the crust is cooling we can make the cheesecake. Because we had just come back from our holiday shopping I was really tired so I used a hand mixer, but you could totally make this without. Whip the heavy cream and the sugar until it reaches stiff peaks. Reserve that in a separate bowl. Combine the vanilla and eggs and beat until pale and smooth.


Where'd you come from Mickey?
Add 4 tablespoons of brown sugar. This will add a richness that you won't get with white sugar. Your butter and cream cheese should be super soft by now. Cream the cheese and the butter into the mixture until it's nice and smooth. Now it's time to add in the secret ingredient. Well not that secret seeing that it's in the title but anyways add the booze. I really love the flavor and the richness the Irish cream adds to this dish, plus I think it's a delicious variation to the standard plain cheesecake. Lastly toss in 2 tablespoons of instant coffee. I'm sure you knew that coffee and chocolate work good together, but did you know that coffee and Bailey's do as well. So due to the transitive property of equality the three must all work wonders together. Don't give me that look you learned that in 6th grade Trigonometry. 


Fold the reserved whipped cream into the cream cheese mixture and pour onto the crust. Place the cheesecake in a pan tall enough to pour water halfway up the side. Instead of pouring the water in and then moving it to the oven. I put the pan on the oven rack and then pour the water in. It's much easier that way. Turn the oven down to 325 and bake the cheesecake for 45-55 minutes, or until the edges are slightly brown but the center jiggles. 


In the meantime let's make the chocolate mousse. In a saucepan separate 4 yolks and add 2 tablespoons of sugar and 3/4 of a cup of heavy cream. Stir this on medium low or until it can coat the back of a spoon. Strain the mixture to ensure that you're left with a smooth mousse and transfer it back onto the stove to melt the chocolate. I just used the regular, semi sweet chocolate chips that you can find at Costco. Of course you could use good, expensive chocolate, in fact I debated to, but I wanted to make this recipe as accessible as possible to everyone. Turn the heat on low and toss the chocolate in. The residual heat should be enough to slowly melt the chocolate. Also throw in 2 tablespoons of cocoa powder. Because the cacao levels in the chocolate aren't very high, the cocoa powder will give the chocolate a deeper, chocolatey flavor. Add in the tiniest bit of vanilla and two tablespoons of Bailey's. We're not done yet. Take the rest of the heavy cream (1 1/4 cups) and 2 tablespoons of sugar. Whisk this until stiff peaks, just like what we did with the cheesecake. To make this a mousse we need to fold in our whipped cream. Take the first third of cream and stir that in, just to loosen the mixture. After that you need to be careful not to pop the air bubbles. Fold it until you cannot see any streaks of white. Refrigerate until cold. It should be slightly thick but once it cools it'll thicken even more. When everything is chilled, about twenty minutes, top the cake with the mousse. Fridge again.


I made the fatal mistake of waiting until dark to take these pictures so keep in mind that this looks way better in person.


When everyone is ready to eat, unmold the pan and serve. 
The smooth mousse rolls into the light rich cheesecake and the chocolate crust provides that crunch that the cake needs. Not only can you taste the coffee and the chocolate, two combinations that work so well together, but the Bailey's flavor runs throughout. Trust me all your friends will go crazy over this. Thanks for joining me on another chow-fectionary creation. And as always, 

Chow!


Recipe

For the Crust
1 1/2 sleeves of graham crackers
1/2 tablespoon of  white sugar
2 tablespoon of unsweetened cocoa powder
5 tablespoon of butter
pinch of salt

For the Cheesecake
1 cup of heavy cream
3 tablespoons of white sugar
1 teaspoon of vanilla extract
2 eggs
3 tablespoons of softened butter
3 cups of softened cream cheese
4 tablespoons of brown sugar
3 tablespoons of Bailey's Irish Cream
1 1/2 tablespoons of instant coffee granules or 1 1/2 tablespoons of strong coffee

For the Chocolate Mousse
4 large egg yolks
2 tablespoons of white sugar--divided
2 cups heavy cream--divided
1 1/2 cup of semi-sweet chocolate chips--a.k.a 8 ounces of chocolate
2 tablespoons of Bailey's Irish Cream
2 tablespoons of cocoa powder
1 teaspoon of vanilla extract

You Might Like:

Strawberry Cream Cheese Coffee Cake
Churro Balls
The Best Zucchini Bread 

Thursday, November 28, 2013

Coming Soon - Chocolate Bailey's Irish Cream Cheesecake


The name may not roll of the tongue but I can assure you that it tastes better than it sounds. This chow-fection is like when a cheesecake makes love with a chocolate mousse and Bailey's. That's right, we went there. Maybe this cake wasn't the easiest thing to make but it was certainly worth it. This light creamy cheesecake was absolutely delicious spiked with Bailey's, but the star of the show, I think, was the chocolate mousse. Not to bore you with the details but stay tuned for this scrumpdiliuptious chow-fection. And as always, 

Chow!

Tuesday, November 26, 2013

Chewy Coconut Bars - The Brownie's Lesser Known Cousin

The holidays lend me so much to be grateful for, my family, good health, and coconut bars! Well, less than good health after you eat them. But isn't that what the holidays are about. We suffer and scrape by on atkins and or weight watchers for the better part of the year just so we can eat chewy coconut bars today. This holiday season don't you think your family deserves to indulge a little, and what better way to gain back those 3 pounds than with this scrumptious chow-fection.

So before I start this recipe I want to get something off my chest. It's been really bugging me and, I don't think I can hold it in any longer. Okay...sigh...I guess here it goes. I really don't like n...uts in my desserts. Am I the only one who feels this way. I don't like it when you try to take a bite of something moist and chewy and then there's a nut obstructing your chew. It's like when you're on a date and you want to have this intimate moment with someone but your creepy friend is tagging along. Nuts are creepy friends. Actually that's where the origin of the word came from. When someone is being creepy, borderline stalkerish, you call them a nut. But anyways that's why in this recipe I didn't add any almonds or cashews, although you totally could and turn this into an homage to "almond joys". Keep in mind though I'm not saying that nuts do not have their place in the kitchen. I'm simply stating that I don't like them in my bars. Regardless they're going to taste great. However, such as cooking we live and learn and I did have some improvements to this recipe but you're just gonna have to read the post to find out.


Preheat your oven to 350. To start I'm going to cream together my butter and my sugar with my handy dandy spoonula. I didn't have the patience to do this but make sure you're butter is up to room temperature because that will make it a lot easier to incorporate into the sugar. Hence the lumps of butter in my batter. (In hindsight it really didn't matter)


If you look at the bottom of the post the recipe asks for packed brown sugar. What's the difference if I just scoop out a cup? Well if you've played with brown sugar you know that if you squeeze it it'll collapse. Volume measurements for brown sugar can only be precise if as a baker you have a consistent way of measuring. Otherwise you'll have cookies that are too sweet on tuesday, while one wednesday they'll be bland. The correct way to measure dry ingredients however, like flour, is to pile it in as lightly as you can and level off. Once your butter and sugar have creamed add in your eggs and your vanilla and combine. Also, as you can see, I didn't do that either and mine was a little harder to cream. In my defense my job isn't to show you how to do it,  it's to be the guinea pig to show you what not to do, so technically I did that on purpose. (Nice Save) By the way I just want to add that I'm not sponsored by Rubbermaid. The spoonula was just trying to let his family know that he's fine and to call the authorities to look into his kidnap. Just for the record I call it surprise adoption not kidnap.   Anyways, once it's all combined we can add in our dry ingredients, that would be the flour, the baking powder, and the salt.


With a batter like this one you don't need to worry too much about over mixing because it's not something like a muffin which needs to be light and fluffy. Next combine your coconut and the chocolate. Nuts are to also be added at this stage if you're feeling in that mood.

Right now is as good as any to tell you that I made a third mistake by not putting enough coconut. Not only are these called Chewy Coconut Bars, but the coconut provides the stability that the bars need when they are being cut. So as beautiful as mine turned out enhanced by a light coat of Photoshop, they could have been a million times better. But you won't make that mistake because I made it for you, your're welcome.


At this stage you should have a thick tan mixture resembling that of a brownie batter. Pour this into a greased 9 by 13 inch baking pan and evenly spread it around making sure to touch the corners of the pan with the batter. Bake for 20-25 minutes or until they are golden and a toothpick comes out cleanly. Please please please do not cut into these hot. Because the butter content in this is pretty high if you cut into them warm they will most certainly fall apart. Once they have cold down, about 20 minutes. Transfer them to the refrigerator where you should hold them until they are nice and hard. Slice them in the pan and use a spatula to remove them. You can get 16 good sized pieces but if you're serving a large crowd cutting them in half will not offend anyone.


So there you have it my chewy coconut bars perfect for any holiday gatherings or just sharing with your loved ones. They definitely live up to their word and the nice part about them is they weren't too sweet. Although mine turned out delicious there were some flaws, but I only have confidence that you will thrive from my mistakes. Keep scrolling down for my *improved* recipe and check back soon for another delicious chow-fection. And as always,

Chow!

Recipe

Chewy Coconut Bars
2 cups all-purpose flour
1 teaspoon baking powder
1/2 teaspoon salt
2/3 cup butter
2 cups packed brown sugar
1 teaspoon vanilla extract
3 eggs
3/4 cup milk chocolate chips (semi-sweet is substitutable)
3/4 cup chopped walnuts or almonds (optional)
1 1/2 cup shredded coconut


This recipe was modified from from the amazing allrecipes.com so click the link to see the original

You Might Like:

How To Prepare A Coconut
Assorted Macaroons
Homemade Sweetened Coconut Flakes

Coming Soon - Chewy Coconut Bars


Maybe I have a coconut fetish, or I accidently bought too much but here I am again will another coconut recipe. In the coming days I'll be showing you the perfect holiday, work, potluck offering that will not only be delicious, but easy to make. These relatives of the fudgy brownie are chewy and gooey, filled with coconut and chocolate. After a heavy thanksgiving meal you want to have something you can carry around while you do your black friday shopping. These bars are so delicious that it's been reported to be deployed to distract shoppers from deals. Reported by me. Nevertheless I hope you make these for your big day, please stay tuned, and as always,

Chow!

Sunday, November 24, 2013

Assorted Macaroons - Welcome to America


Oh boy! Macaroons! I sure love me some of those mini french sandwich cookies that are soooo in style right now. You're really showing us how to make those Chef Chow? EH-UH! That was supposed to be the sound a buzzer makes. No I'm showing you how to make the american coconut macaroons. You know the you always shy away from because they're way too sweet macaroons. The only difference is, mine are delicious!

Now I know not all of you think that they're overly sweet but I do, and so do the members of my weekly, overly sweet macaroons club. But you don't have to worry because I found two tricks to cut the sweetness of the macaroons so they taste just perfect! The first trick is to toast your coconut flakes before you actually bake the cookies. This way the initial sugar from the sweetened coconut gets caramelized, and all you're left with is a deep coconut flavor. My second tip is to add different flavorings. Macaroons are often too sweet because there's no flour or butter to absorb the sugar. Adding citrus or nuts can balance the flavor, and not to mention show people that you aren't just a one-trick pony. 


This year I made three different flavors, and at the end I couldn't pick a favorite. I made cranberry orange, double chocolate, and an homage to one of my favorite candy bars, "Almond Joy" macaroons. Dare I say they were all equally delicious. So to start these cookies we need to make our macaroon base. Which starts with the toasting of our sweetened coconut shreds. Which will go in a 350 oven. By the way if you want to use fresh coconut click the link to read my previous post on how to do that.

Sprinkle your coconut evenly on a baking sheet and slide them into the middle rack of your oven. Of course I took a picture of my greased mat but I ended up forgetting about it in the sink. Lucky for me though my coconut did not stick so I'm pretty proud of that. Yes, those are things that I'm proud of. Every 5 minutes stir the pan so everything crisps evenly. Your coconut flakes should take between 15- 20 minutes but don't leave the room. Coconut is notorious for burning. If it doesn't see you looking at it it'll get upset so watch it like a hawk...because it'll be watching you. *Dramatic Music*

But on a less creepy note after 15 minutes my coconut flakes looked like this. Oh so beautiful. You could really just eat them like this as a snack but your patience will be rewarded. So the next step is to make the meringue. A meringue is just egg whites beaten with sugar until thick and glossy. This is one of the few things I take out my hand mixer for because it's gonna take a while. Approximately 8-10 minutes with a hand mixer, or a stand mixer. Stop when you've reached stiff peaks. Which basically means that they should be able to hold their shape. You'll know when the wake of the meringue stays it's place. If you're still confused just look at the picture. Remember if your bowl is dirty or if some yolk leeches itself into your egg whites you won't reach desired stiffness. 


It's important that you whisk your eggs long enough because then your macaroons will fall apart. After your meringue has tripled in volume and has reached stiff peaks whisk in your vanilla and salt. 

Switch to your handy dandy spoonula and divide into three parts. Separate into bowls and fold in whatever flavorings you want, including your coconut. You can be as creative as you want in this step. Meringues are basically blank canvases so you can't really go wrong - unless you go wrong. The only thing you want to be mindful of is not to alter the consistency of the meringue. If you add too much liquid then your cookies will fall apart, and the same goes for adding too much other stuff. It's also important not to over mix these. All you want to do is fold the mixture until it's barely combined. Your mindset should be, I still have about 3 mixes left, I'll stop here. Remember when you're scooping these out they will continue to mix. The key is not to destroy those little air bubbles that are trapped in the meringue. You worked hard for those. By the way the variations and flavorings that I conjured up are in the recipe below so pop down there if you can't figure out what to put in yours. 


Now we are going to take our 1 inch ice cream scoop and plop them on a well greased cookie sheet. Try to make them all the same size, you should get about 12 macaroons per flavor. It depends on how precise you were at dividing those meringues, which in my case was not very well, but I have faith that you will do better. You can place these guys fairly close to each other because they won't expand, but for photography reasons I kept them a good distance apart. Place these in the middle rack of your preheated 350 oven, and bake for 15-20 minutes, or until the macaroons are golden brown. When you take these out they will be dry to the touch, the outsides will be golden, but they will still jiggle. That's normal as they cool they will firm up substantially and you'll be looking at one hell of a cookie, if I do say so myself. 

If you made these in the flavors that I suggested you should have three ascending shades of goldenness. The "almond joy" will be the lightest colored, the orange cranberry will be slightly tanner, and the chocolate will be the Tracy Morgan of the three. If you don't know who that is you should know I'm not a racist, but that's the first place my mind went. Just for the record I'm a huge fan so if you're reading this please comment below. 

Once you've finish taking pictures - which is optional, you're done!


I like to serve my assorted macaroons along side some coffee or on a festive holiday platter. Make sure you alternate flavors so people know you took the effort to create different types of macaroons. Why go through all the trouble if the message that, "I'm better than you", isn't getting across. 


Your friends and family will be so impressed that you knew how to make these and so will yourself. These macaroons are lightly crispy on the outside, but super chewy on the inside. My guests said that they weren't overly sweet and that the orange cranberry was there favorite. I still can't choose a favorite, it's like asking someone who there favorite 1 Direction member is, you can't decide. 

But in all seriousness I'd like to thank everyone who read today's post, leave a comment below on how I can improve or if you think I'm perfect. Subscribe if you haven't, and check back daily for new chow-fections. And as always, 

Chow!

Recipe

For Macaroon Base
3 cups of toasted sweetened coconut flakes
4 large egg whites
1/2 cup sugar
1 teaspoon vanilla extract
1/4 teaspoon kosher salt

For Cranberry Orange Macaroons
1/3 cup of dried cranberries
the zest of one orange

For "Almond Joy" Macaroons
1/4 cup of semi-sweet chocolate chips
1/4 cup of chopped or sliced almonds ( I used cashews and they were still delicious)

For Double Chocolate Macaroons
1 1/2 tablespoons of unsweetened cocoa powder
1/4 cup of semi-sweet chocolate chips

*Measurements for each variation are for a third of the base*

You Might Like:

Sweetened Coconut Flakes
Chewy Coconut Bars
Momma's Sour Cream Cookies

Sweetened Coconut Flakes - Better than Store Bought


Now if you've been following me since the last post on how to prepare a coconut, you probably have a container of coconut meat hidden in your fridge so take that out now. To turn this fresh coconut into sweetened coconut that you buy from the store you need to boil a cup of water. Add 16 teaspoons of granulated sugar and mix until dissolved, shut the stove off. While your water was boiling you should've taken your coconut and shredded it on a grater or in a food processor. You want small flakes of coconut, it depends on how merciful you are feeling today. Pack cups of coconut and throw them into the sugar water. You should have 4 cups. Buy more if you don't, and eat the remainder if you have extras. The coconut should absorb all of that liquid. Spread them on a lined cookie sheet until dried. To speed up the process every thirty minutes shuffle the flakes around with a spatula.

Now if you know that you are going to be using toasted coconut you don't even need to let these dry. Just throw these in the oven at 350 stirring every five minutes until golden brown. In the end you should have 14 ounces of homemade sweetened coconut and house that everyone on the block will envy. By the way this recipe will yield the same amount of sweetened coconut that they sell in the supermarkets.

Recipe

1 cup water
16 teaspoons sugar
4 cups of packed fresh coconut


You Might Like:

Chewy Coconut Bars
Assorted Macaroons
Roasted Strawberry Tart

Coming Soon

Okay I promise this is the last time this will happen. Actually i can't promise that, but I'll try my best. Originally I was going to use the coconut I prepared in the post before to make my delicious Coconut Bundt Cake but, as you can probably guess there has been a slight change of plans.  I thought about it and I decided to make my potluck famous, assortment of macaroons. That's right!, why make only one type of something if they're this easy to make. This is definitely an easier party dessert than a cake, and you don't have to worry about slicing it. I know, I was hoping to eat cake too, maybe next year. But nevertheless these macaroons will be the spotlight of your next dinner party so I hope you give these a try. The post will be up in the next day or earlier so keep checking back for that. And as always, 

Chow!

Thursday, November 21, 2013

Skills Test - How to Prepare a Coconut


Now I know what you're thinking. Does this mean I have to get my jackhammer out? No silly let's leave the jackhammers for the roads please. Cracking open a coconut is much easier than you think but i can't blame you, even I was a little intimidated at first. It used to be before when I was at the supermarket, I would always try to avoid the coconuts. I couldn't help but feel their "eyes" staring at me, all of them judging and sizing me up, kind of like high-school. But, today I summed up all my courage and went to pick one up and guess what? I lived to tell the tale. 

In this lesson I'll be showing you how to crack the code on a mature coconut. This variety of coconut is what you would picture hanging from a palm tree, or at least what I picture. These are not to be confused with a young coconut which are white and look like a pentagon. So today's blog post isn't so much a recipe as it is a very helpful skill. On a sidenote, if you're ever stranded on a deserted island you can thank me for saving your life. I kid I kid - but seriously. 

As easy and tempting as it is to buy just pre-packaged coconut, I think this is something all of us should try at least once in our lifetimes. Whether that be for fun or necessity...

So first things first you need to buy your coconut, which is pretty much the same as adopting a child. You need to shake it around to see if the inside has water. If it does, you know your kid is alive. If it doesn't then set it down and move on, there are plenty more live nuts to choose from. Once you've found a full coconut, you need to look into it's eyes. If there aren't any mold or bugs in them then you're good. Take that one home and get on with the prepping. 


Also I think you should know that if you forget to pay for your coconut it's technically kidnap so do remember to fill out the required paperwork. 

Take your baby and locate it's eyes. Notice that it has three of them. That means someone shouldn't have been drinking while they were pregnant. I'm just joking it's completely normal. One of those eyes will be soft enough for a sharp paring knife to go through. Once you have inserted the knife, twist, thrust, and jab it until you have cleared out a straight shot to the innards of your nut. 


OMG That looks 100 times creepier than before! We just gave it a mouth!


Calm done Chef, find your inner Chow. Okay Phew.
Believe it or not now you can pour out the coconut water.


Coconut water is supposed to be super good for you, filled with electrolytes to keep you moving, but not only that, it taste delicious. That's acutally a mandatory step, you have to taste the water. If you've never had coconut water before it has a tropically, some people say bready taste to it, which has some getting used to. If you don't want yours send it to me. But the real reason why I want you to taste it is to check if your coconut has gone spoiled. We've all been there. You say you're going to make it but then you're too lazy to and then by then you've forgotten why you ever bought it but then you remember but then...take a deep breath. It's been three months. That type of spoiled.

Be objective as you can be and if it taste slightly sour then you should switch to your back-up coconut. Which knowing you, you bought the same time you bought the first one because you were lazy. So just go to the store and abduct some new ones.

A coconut has a natural line around the circumference of the nut. This is the weakest part of the coconut and, where you should be hammering away. Hold the coconut in your non dominant hand, and go all donkey kong on it. It's a great way to get all your bundled up anger out. You don't want to hammer on your countertop because that could end really badly. 


Once you crack the top off you should have two similarly sized halves. Wrap the two pieces with a kitchen towel securely, so as to not have any shards of coconut fly at you from under. Smash away. 

You should have shards of coconut husk and flesh. Take the same paring knife you used before and slide the knife between the flesh and the husk. Pry it off by using the good old force of leverage and throw into a bowl of water. When you are done removing the flesh rinse them well and Ta-da.


At this point I have to apologize. While I was taking pictures my hand slipped from under me and the camera slammed against the side of the table. I don't want to make any assumptions but I think it's broken. That's also why the picture before is so blurry because I used my computer's webcam. The good news is we are nearing the end of this lesson, but the bad news is now I have to find a new camera. May I suggest an early christmas present to my secret santas out there?

All there is left to do is chop, blend, or my favorite grate the coconut - I think I'm the first one to ever try grating coconut ;) - into your desired shape. You can totally toast these and garnish on cookies or muffins. Or you could make american macaroons, not the french ones, which I will demo sometime in the near future. The possibilities are endless. Except, DO not want to do is put it in a smoothie. Mature coconut flesh is much more fibrous than a young coconut's which is the preferred nut for this application. Other than that though, the possibilities are endless! 

But that is it for this post, if you liked it or just like me give it an ol' thumbs up and subscribe to the blog. Check back soon when I use this flesh to make a beautiful coconut bundt cake which is to die for so stay tuned. And as always, 

Chow!                                                       

Tuesday, November 19, 2013

Coming Soon - Coconut Bundt Cake

As an avid follower of health and food crazes, I'm well aware of the coco water rave that has been exploding in the supermarkets. Okay I may be a couple of months late, but, I still have a new, delicious chow-fection to share with you all. This Coconut Bundt Cake is so moist, so tender, and most ironically it's not even remotely healthy. In fact, you might even want to consider just looking at the next post for fear of gaining a pound. But if you're a risk-taker this is the perfect party cake for you and your guests, so i hope you stay tuned. But before I show you that, I want to teach you how to crack open a coconut. You can't make Coconut Bundt Cake without coconut. You didn't think I was gonna let you cook with the "already-made" stuff. Anyways stay tuned for that as well, and as always,

Chow!

Sunday, November 17, 2013

Spiced Caramel Swirled Ice Cream


This Thanksgiving I'll be showing you how to make your own ice cream. That's right! But now just any ice cream, a Spiced Caramel Ice Cream. Once you go Cold and Creamy you won't go back! Not only is this ice cream easy to make, but it costs a billion times less than in the supermarkets (statistics not to scale). 

I spiked this classic creamy vanilla ice cream with autumn spices and smooth thick caramel. You'll be kicking yourself in the head why you ever purchased store bought caramel in the past after you try this recipe. And by the way, to anyone reading this blog it's not carmels. Never pronounce caramel carmel, there's an extra letter after the r. You know what happens when you leave off an extra letter, your dessert becomes a desert. 

Now for me, I prefer an American style  ice cream. This style is definitely not as rich as a French Style with egg yolks, but who needs the calories. I think the heavy cream is plenty enough rich but mostly I think the egg yolks mask any flavoring you want to add. Some people also like to do a combination of cream and milk. Call me indulgent, or lazy but only cream for me please. How it works is the less water that is in your base, milk i.e., the less ice crystals are in your finished product, which means a creamier ice cream. You should experiment with different proportions of dairy to find your "perfect scoop", or just copy me, whatever you want. But if you do copy me you have to pay a 5 dollars patent use. :)

So to start this ice cream off we need to put our ice cream bowl in the freezer. I'm using a hamilton beach model but a cuisinart would really be best. Now you know what to give me for Christmas--hint, hint. For all of those readers who also have a small ice cream maker bowl just do two batches like I did. 

So now that we got that squared away we can begin the cooking, which will totally only take you five minutes. Begin by taking your cream and your vanilla extract and bring that to a rolling boil. 


Combine the ginger, nutmeg, and cinnamon together. Don't do what I did in the picture, the spices did not mix with the cold cream. Something about cinnamon and other spices that are hydrophobic, I don't know, I didn't listen much in science class. But anyways learn from my mistake and add 2/3 of your spices after your cream has come to a boil. Reserve a pinch of the spice mix for the caramel.


It might not look like it's combining but keep stirring and most of it will work itself in. If you are worried that your spices aren't combining well with the cream don't be. Even my batch turned out great and I'm as smart as a doorknob. When we put this in the machine all those spices will evenly distribute and you'll be left with nice little specks of cinnamon and ginger. With your spices you are going to add the sugar and the salt. Salt is very important to balance out the sugar and bring out the spices so please don't forget to add that. Once you have thoroughly combined the flavorings throw it in the refrigerator cool slightly. And by the way please do not literally throw your mixture in the fridge, you'll just make a mess and a fool out of yourself. 


At this point you can set up your machine. Take the bowl out of the freezer, which should be ice cold because you left it in there overnight, don't try to cut corners or else your cream will never ice. After twenty minutes take out the ice cream from the refrigerator  You should have a yellowy film of spice and cream on top of the mixture, just stir that back in. Pour it in the machine, turn it on, and get your caramel started. 

To be forewarned if you are clumsy or have parkinsons please do not make this sauce, have the ones who you care about less like the kids or your little brother make it for you instead. Also in an effort to clean as little dishes as possible, use the same pot you used to make the ice cream in--we want to work smart, not hard.


Pour in the sugar and a teaspoon of water-- the water is just to start the melting process. Whenever I make caramel I always go through the same process. 

I look at it.


I wonder whaI did wrong.
I get sad. 


I get optimistic. 
I burn it.
I start over. I didn't want to show you the pictures where I burned it.
But I eventually succeed.
Cook the sugar on medium high until it turns a light amber color which will take about 3 minutes, just look at the picture. At this point shut of the flame and wait a couple seconds. I just stare at it. It'll continue to get darker from the residual heat. Once you think it is the right color get ready, you know what caramel looks like. Be very careful. Throw in your chunk of butter and stir it in with a long wooden spoon--a freakishly long chopstick will do great. Because the sugar is so molten hot it's going to make the butter very mad. After the butter has melted in add your cream. Keep in mind that the sugar does not like cream either. 

Add in a pinch of the remainder spice mix that we used for the ice cream, and throw in a generous pinch of salt--I used sea salt. You know how good salted caramel tastes, so be generous with the salt. 


Oh wow, doesn't that sauce look so sexy. I just want to lick it off the bowl and swirl my finger in it all day--sorry i was getting a little pg 13. 

You might think it looks a little thin but it'll thicken up when it gets cool. Once it is sufficiently cooled, with the mixer running, drizzle in the caramel into the ice cream. Stop once the caramel has swirled. You should have caramel to spare. If your ice cream maker only works with the lid on, swirl in your caramel with a toothpick.   

Freeze the ice cream in a container and serve with whatever toppings you want. Scroll down below for all the ingredients, and as always, 

Chow!

For the Ice Cream

3 cups of heavy cream
3/4 cup of sugar
1/4 tablespoon of ground ginger
1 tablespoon of cinnamon
A pinch of nutmeg
1/2 teaspoon of vanilla extract
pinch of salt

For the Salted Caramel

1/2 cup of sugar
1 teaspoon of water
3 tablespoons of butter
1/4 of heavy cream
And sea salt

You Might Like:

Dairy Free Strawberry Banana Ice Cream
Mini Blueberry Tarts
Faux Macaroons


Type in a Recipe or an Ingredient